 how-to
How Do You Safely Pressure Wash Vinyl Siding?
Last Updated: October 26, 2026
Quick Summary
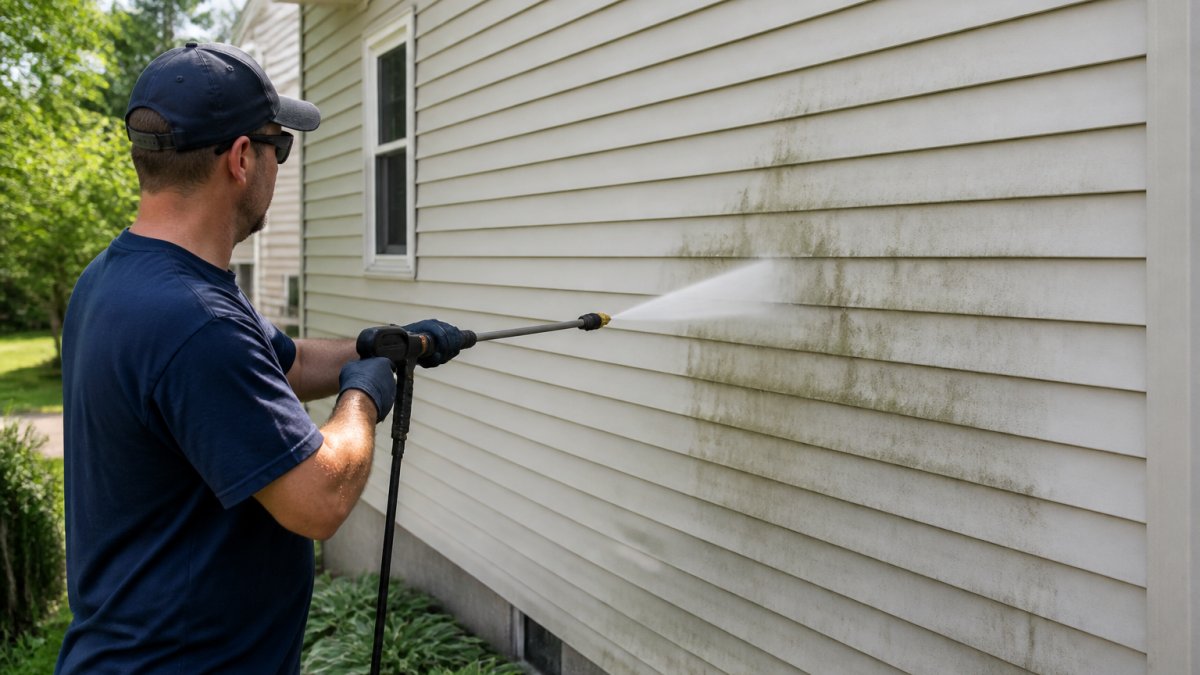
You can safely pressure wash vinyl siding by treating it like a soft wash surface: use 1,300 to 1,600 PSI at the surface, a 25- or 40-degree nozzle, and hold the wand 3 to 4 feet from the wall. Wash from the bottom up, rinse top down, and spray slightly downward at seams so water can't push behind panels.
- Inspect for loose panels, cracks, and failed caulk before washing, since water finds every opening.
- Never use 0-degree or 15-degree tips on vinyl; the 40-degree white tip is the gentlest option.
- For mildew, mix 1 part household bleach to 4 parts water and let it dwell 5 to 10 minutes.
- Never mix bleach with ammonia or acid cleaners, which produces toxic gas.
- Call a professional when siding is high, heavily mildewed, or shows loose panels and cracks.
Table of Contents
- Can You Pressure Wash Vinyl Siding Without Damage?
- Step 1: Inspect and Prepare Your Home Before Washing
- Step 2: Set the Right Pressure Washer PSI for Vinyl Siding
- Step 3: Choose the Best Pressure Washer Nozzle for Siding
- Step 4: Apply a Vinyl Siding Cleaning Solution Safely
- Step 5: Wash from the Bottom Up, Then Rinse Top Down
- How to Remove Mold from Vinyl Siding Without Damage
- When to Call Wilson for Professional Soft Washing
- Frequently Asked Questions
Can You Pressure Wash Vinyl Siding Without Damage?
Yes, you can pressure wash vinyl siding, but only with the right setup and technique. Vinyl is tough, yet it dents, cracks, and lets water in when you push too hard.
The debate over pressure washing vinyl is real. Some manufacturers warn against it. CertainTeed's vinyl siding cleaning guidance says power washing vinyl or polymer siding is not recommended, because it can cause moisture intrusion, damage, or discoloration.
So who's correct? Both, in a sense. The risk isn't the water. It's the operator. A careless pass with a narrow tip can force water behind the panels or gouge the surface.
Here's the core rule that resolves the conflict: treat vinyl like a soft wash surface, not a driveway. You're rinsing off dirt and mildew, not blasting it away.
Step 1: Inspect and Prepare Your Home Before Washing
Start with a slow walk around the house. Look for loose panels, cracked siding, gaps at seams, and caulk that's pulling away. Water finds every one of those openings.
Check these before you touch the washer:
- Loose or lifted siding - reseat or secure it first
- Cracked or chipped panels - mark them so you avoid direct spray
- Failed caulk around windows and doors - repair before washing
- Electrical outlets, fixtures, and AC units - cover or avoid
- Windows and doors - close them tight
Then prep the surroundings. Move patio furniture, grills, and potted plants. Cover landscaping near the house with a tarp. Close windows and doors, and shut off exterior power to outlets you'll spray near.
Watch out: skipping the inspection is the most common mistake we see. A loose seam that looks minor can funnel water behind the wall, and that damage shows up weeks later.
Step 2: Set the Right Pressure Washer PSI for Vinyl Siding
The safe pressure washer PSI for vinyl siding is roughly 1,300 to 1,600 PSI at the surface, not necessarily the number printed on the machine. That distinction is where most online advice falls apart.
Here is a practical starting chart for vinyl. Treat it as a baseline, then test on a hidden section:
| Task | Nozzle | Distance from wall | Target surface pressure |
|---|---|---|---|
| Pre-wet / final rinse | 40° (white) | 4-5 ft | Under 1,000 PSI |
| General dirt and pollen | 25° (green) | 3-4 ft | 1,300-1,600 PSI |
| Mildew on shaded panels | 40° (white) + detergent | 3-4 ft | Under 1,300 PSI |
| Soap application | Black soap tip | 3-4 ft | Low / gravity-fed |
| Never on vinyl | 0° (red) or 15° (yellow) | , | , |
A few practical notes:
- Electric washers often top out around 1,600 to 2,000 PSI. That is workable at the low end with a 40-degree tip, but check the actual rated pressure, many budget units advertise peak PSI that they only hit briefly.
- Gas washers can run 2,700 to 4,000 PSI and will damage vinyl at full throttle. Use the lowest setting, a 40-degree tip, and extra distance.
- Pressure washer wands with adjustable unloader valves let you dial down at the pump. If yours has one, back it off before you start.
- Never use full pressure on vinyl, no matter what the label claims.
Why the range matters: vinyl is a thermoplastic. Above roughly 1,600 PSI at the surface, a narrow stream can dent panels, drive water past the locking seam, and scuff the finish. Below about 1,300 PSI with a wide tip, you are mostly rinsing, which is the goal.
If you are unsure, test on a hidden section first. Spray a small area near a corner and check for dents, finish wear, or water weeping from a seam before moving on.
Step 3: Choose the Best Pressure Washer Nozzle for Siding
The best pressure washer nozzle for siding is a wide-angle tip, typically 25 to 40 degrees. A 25-degree nozzle handles general rinsing, while a 40-degree tip is the gentlest option and the safest for vinyl. Skip the narrow red and yellow tips entirely.
Nozzle color codes follow a standard:
- Red (0°) - pinpoint, never use on siding
- Yellow (15°) - too aggressive for vinyl
- Green (25°) - general rinsing, use with care
- White (40°) - softest fan, best for siding
- Black - soap tip for detergent application
The 15-degree nozzle shows up in a lot of online advice, but we'd keep it away from vinyl. It concentrates too much force in one line. A 25- or 40-degree tip spreads the spray into a wide fan that cleans evenly.
Match your spray pattern to the panel. Keep the fan moving in a consistent side-to-side motion, and don't hold it in one spot.
Step 4: Apply a Vinyl Siding Cleaning Solution Safely
A good vinyl siding cleaning solution does most of the work, so you can rinse gently. The gap in most online guides is the chemistry: how much to dilute, how long to let it dwell, and what never to mix. Here is the practical version.
Start with a siding-safe base mix. A mild liquid detergent (a few ounces per gallon of water) is enough for pollen, dust, and light grime. For mildew, add white vinegar at roughly 1 part vinegar to 3 parts water. For heavier mildew or algae, a diluted bleach mix is the standard approach, but dilution and dwell time matter more than strength.
Bleach dilution that works without dulling vinyl:
- Mix 1 part household bleach (about 6% sodium hypochlorite) to 4 parts water, roughly a 1.2% solution at the surface. Stronger mixes dull the finish and stain adjacent surfaces.
- Add a squirt of mild dish soap to help the mix cling. Do not add ammonia, acids, or other cleaners.
- Apply from the bottom up with the black soap tip, working in sections no larger than about 10 feet wide.
- Let it dwell 5 to 10 minutes, enough to kill mildew, not enough to dry. If it starts to dry, mist it lightly or rinse and reapply.
- Rinse top down with a 40-degree tip before the solution dries.
Chemical safety rules that are not optional:
- Never mix bleach with ammonia (found in some glass cleaners) or with acid cleaners (found in some descalers and rust removers). The result is toxic gas.
- Wear gloves and eye protection, and keep the mix off your skin.
- Keep runoff away from plants, grass, and storm drains. Pre-wet landscaping with plain water, then rinse it again after washing.
- Test any cleaner on a hidden spot, an inconspicuous panel or the back of the house, before you commit to the whole wall.
- Do not let bleach solution sit on metal fixtures, screens, or light-colored trim; rinse them promptly.
A common pattern among homeowners is to skip the dwell time and scrub harder instead. That is backwards. The chemistry loosens the mildew; the rinse carries it away. Scrubbing with an abrasive pad scuffs the finish and leaves a dull patch that stands out in sunlight.
Step 5: Wash from the Bottom Up, Then Rinse Top Down
Wash from the bottom up, then rinse from the top down. That order prevents dirty water streaks from drying on clean panels above. Start low so the cleaner and grime run down onto areas you'll clean next, then rinse everything from the top so the final water carries dirt to the ground.
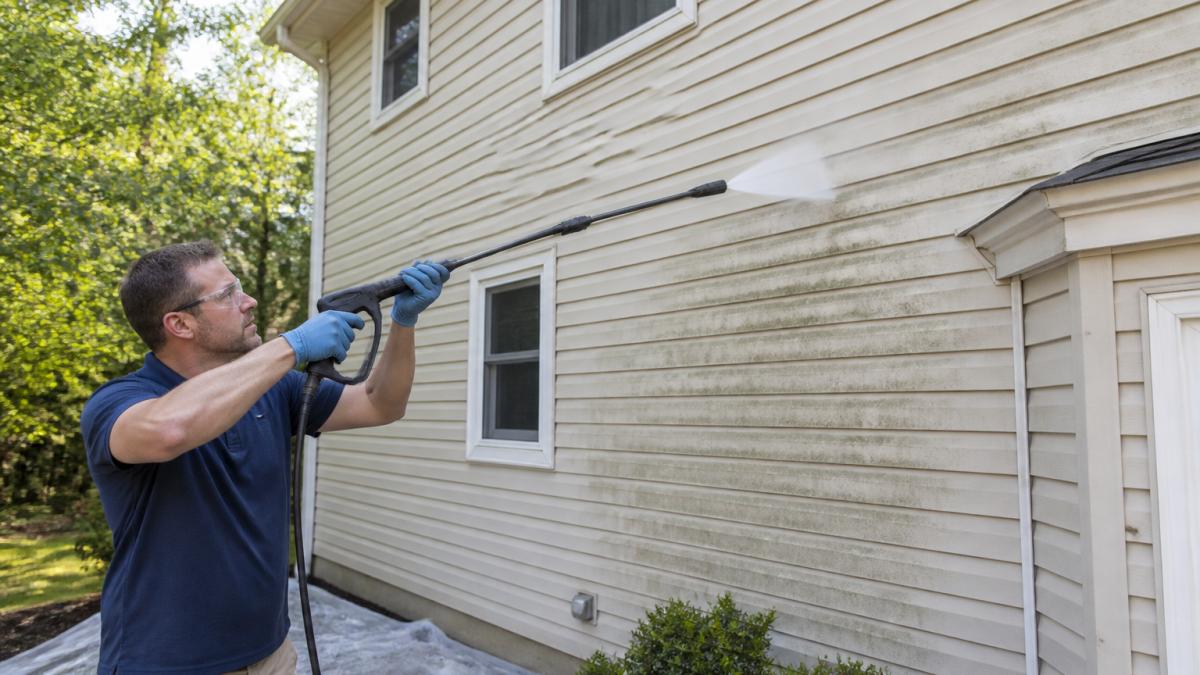
Keep these technique rules in mind:
- Hold the wand 3 to 4 feet from the wall and adjust as needed
- Use a consistent side-to-side motion across each panel
- Spray slightly downward at the seams so water can't push behind them
- Work in small sections and overlap your passes
The downward angle is the water-intrusion safeguard. Spraying straight in or upward at a seam invites water behind the panel. Aim the stream down and let gravity help.
How to Remove Mold from Vinyl Siding Without Damage
To remove mold from vinyl siding, use a diluted bleach or vinegar solution, let it dwell, and rinse gently with low pressure. Mildew and mold show up as dark green or black streaks, usually on shaded sides of the house. The fix is chemistry, not force.
Here's the sequence:
- Mix 1 part bleach to 4 parts water or a vinegar-and-detergent solution
- Apply from the bottom up with a soap tip
- Let it sit 5 to 10 minutes, but don't let it dry
- Scrub stubborn spots with a soft brush on a pole
- Rinse top down with a wide nozzle
For algae and dirt, a mild detergent usually does the job. For mold, the bleach mix works better. Never scrub hard with an abrasive pad. It scuffs the finish and creates a dull patch that stands out.
If mold keeps coming back, the cause is usually moisture or shade, not a cleaning failure. That's worth a closer look.
When to Call Wilson for Professional Soft Washing
Some jobs are better left to a pro. If your siding is high, heavily mildewed, or showing loose panels, soft washing from a trained crew protects both the surface and your time.
Call us when:
- The siding reaches areas you can't safely spray from the ground
- Mold keeps returning despite cleaning
- You spot loose panels, cracks, or failing caulk
- You'd rather not risk water intrusion on a large or older home
Our team uses low-pressure soft washing to lift dirt and mildew, then rinses clean. We also handle carpet, upholstery, and air duct cleaning, so one call covers more of your property.
Watch out: a DIY pressure washing mistake can cost more to repair than a professional wash. If anything about the job feels risky, that's your sign to call.
Vinyl siding takes a beating from weather, pollen, and mildew, and cleaning it yourself is doable with the right pressure, nozzle, and technique.
Frequently Asked Questions
Can you safely power wash vinyl siding?
Yes, vinyl siding can typically withstand pressure washing when you use low pressure. Consumer Reports notes vinyl is pliable and generally handles it well, but CertainTeed advises against power washing because of moisture intrusion risk. To pressure wash vinyl siding safely, stay under 1,600 PSI, use a 25- or 40-degree nozzle, and keep the wand at least 3 feet from the surface. Always spray downward at a slight angle to push water out of seams rather than behind them.
What PSI will damage vinyl siding?
Pressure above 1,600 PSI can crack, chip, or force water behind vinyl panels. Window World NWLA recommends 1,300 to 1,600 PSI for vinyl siding, while many manufacturers suggest staying at the lower end. Even at safe pressure, holding the nozzle too close or using a narrow tip like a 0-degree or 15-degree nozzle can cause damage. Always test a small hidden area first and increase distance before increasing pressure.
Should you pressure wash vinyl siding from the top or bottom?
Start washing from the bottom up. Applying cleaning solution from the bottom prevents dirty water from streaking down over clean sections. When rinsing, work from the top down so dirty water flows over already-rinsed areas. MITM recommends this top-down rinse and standing 3 to 4 feet away. Keep the spray angled slightly downward so water doesn't get forced up under the siding seams.
How do you remove mold and mildew from vinyl siding?
Mix a vinyl siding cleaning solution of one part bleach to three parts water with a few drops of mild dish soap. Apply it from the bottom up using a low-pressure sprayer or garden hose, let it sit for 5 to 10 minutes without letting it dry, then rinse thoroughly from the top down. For stubborn mold, use a soft-bristle brush on a pole. Never mix bleach with ammonia or other cleaners, and wear eye protection and gloves.