 How-to
How to Test Indoor Air Quality at Home Step by Step
Quick Summary
To test indoor air quality at home, start by noticing signs like musty smells, stuffiness, or dust that returns quickly, then use a monitor that measures the pollutants you're concerned about. Place it at breathing height, away from vents and windows, and take a baseline reading for 30 to 60 minutes. Log household activities and track readings over several days to spot patterns.
- Match the monitor's sensors to your concern, such as PM2.5 for dust or smoke.
- Place the monitor at roughly seated head height, away from windows, doors, and vents.
- Avoid direct sunlight, stoves, and candles, since they skew temperature and particle readings.
- Run a baseline of at least 30 to 60 minutes before judging any number.
- Track readings for several days to a week, and log cooking, cleaning, and dryer use.
Table of Contents
- What Indoor Air Quality Means and Why It Matters at Home
- Common Indoor Air Pollutants and What Each One Tells You
- Signs of Poor Indoor Air Quality You Can Spot Without a Test
- Choosing the Best Indoor Air Quality Monitor for Your Home
- Step-by-Step: How to Test the Air Quality in Your Home for Mold
- Reading Your Results and Their Limits
- Deciding Your Next Step: Booking Indoor Air Quality Testing
- Frequently Asked Questions
How to Test Indoor Air Quality at Home Step by Step
Last Updated: November 7, 2026
What Indoor Air Quality Means and Why It Matters at Home
Indoor air quality is the condition of the air inside your home, including the pollutants, moisture, and ventilation that affect how it feels and how healthy it is (the EPA). Most people spend a large share of their time indoors, so the air there matters.
According to the U.S. EPA indoor air quality overview, Americans spend most of their time indoors, where some pollutants can build up to higher levels than outdoors. That is why a quick check of your home air can be worth the effort.
Poor indoor air can cause stuffy rooms, headaches, dust that keeps coming back, and allergy flare-ups. Some problems you can see or smell. Others you cannot, which is why testing helps.
Common Indoor Air Pollutants and What Each One Tells You
Different pollutants point to different problems. Knowing what to look for makes testing much easier.
- Particulate matter (PM2.5): Tiny particles from smoke, cooking, and outdoor air. High readings often point to poor filtration or nearby sources.
- Carbon dioxide (CO2): Builds up when rooms are closed up with too many people. High CO2 usually means not enough fresh air is coming in.
- Humidity: Levels that stay high can encourage mold and dust mites. Persistent dampness is a warning sign.
- Volatile organic compounds (VOCs): Released by paints, cleaners, and new furniture. They often show up as a chemical smell.
- Mold spores: Often linked to leaks or damp areas. Musty odors are a common clue.
Dryer lint and dust can also add to particle levels. A clogged dryer vent is one source worth checking.
Signs of Poor Indoor Air Quality You Can Spot Without a Test
You do not always need a monitor to notice a problem. Watch for these signs:
- Dust returns quickly after cleaning
- Stale or musty smells that do not go away
- Stuffy air, especially in bedrooms at night
- Allergy symptoms that improve when you leave home
- Visible dust on vents or in air returns
- Condensation on windows or damp spots on walls
If you see several of these at once, a test is a good next step. Persistent odors or visible mold should be checked promptly.
Choosing the Best Indoor Air Quality Monitor for Your Home
A home monitor is a practical way to start, but the monitor is only half the tool. The other half is how you use it. A modest monitor used with a consistent sampling protocol can produce more useful information than an expensive monitor placed wherever it happens to fit.
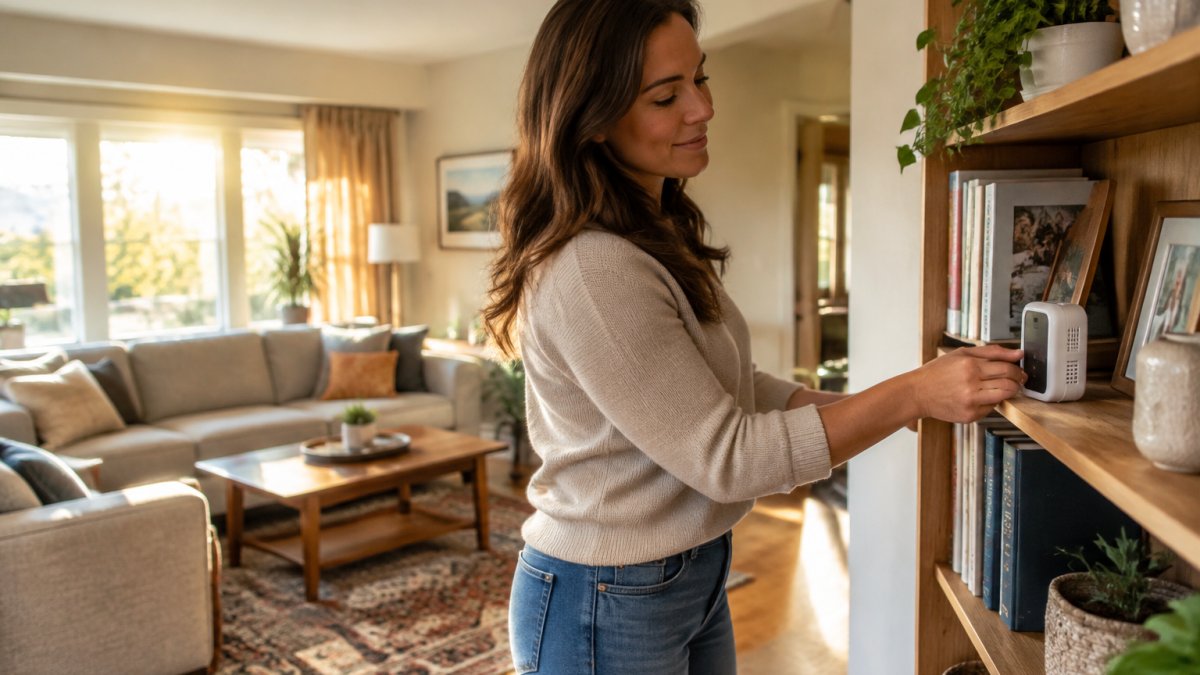
Match the sensors to your concern
Low-cost monitors do not measure everything. Each unit reports only the pollutants its sensors detect, so start with the concern you are trying to resolve:
- Allergies, dust, or smoke: prioritize a monitor with a particulate matter (PM2.5) sensor.
- Stuffy rooms, headaches, or poor sleep: prioritize carbon dioxide (CO2) and humidity.
- Chemical or new-furniture smells: prioritize a volatile organic compound (VOC) sensor, and treat its readings as a relative trend rather than an absolute number.
- Dampness or musty odors: prioritize humidity and temperature, and plan a separate moisture inspection.
A monitor that reports PM2.5, CO2, humidity, temperature, and VOCs covers the most common household questions. Radon and mold are not reliably measured by consumer monitors and need dedicated test kits or a professional assessment.
A practical sampling protocol
Where you place the monitor and how long you collect readings matter as much as the sensor itself. A common pattern is to run a short baseline, then a longer observation period:
- Place the monitor at breathing height, roughly seated head height, in the room you want to evaluate. Keep it at least a few feet from windows, doors, supply vents, and return grilles so you are not measuring the air coming out of the system.
- Avoid direct sunlight, stoves, and candles. Radiant heat and local sources will skew temperature and particle readings.
- Run a baseline of at least 30 to 60 minutes with the room in its normal state, no cooking, no cleaning, no extra people, before you judge a number.
- Collect a longer observation period of several days to a week in the room you care about. Air changes with the time of day, weather, heating or cooling use, and how often doors and windows open.
- Log household activities alongside the readings. Note cooking, cleaning, showers, laundry, and dryer use so you can connect a spike to its source.
- Repeat measurements in the same spot under similar conditions before you draw a conclusion. A single reading is a snapshot, not a verdict.
Watch out: moving the monitor between rooms mid-session and comparing the numbers directly will mislead you, because each room has its own baseline and its own sources.
Continuous monitoring versus one-time testing
A monitor left running for days or weeks shows patterns a single snapshot misses, the morning CO2 peak in a closed bedroom, the particle spike when the oven turns on, the humidity climb after showers. One-time testing with a kit or a short monitor session is better suited to a specific question, such as whether a room clears after you open a window or whether a new piece of furniture is off-gassing. Use continuous monitoring to find patterns and one-time testing to confirm a specific source.
What consumer monitors cannot tell you
Consumer monitors detect specific pollutants and estimate others. Their readings are useful for trends and relative comparisons, but they are not laboratory measurements. Radon requires a dedicated test kit or a qualified professional (the EPA). Mold requires a moisture inspection and, in some cases, laboratory analysis of samples. If your concern is one of those, a monitor alone will not answer it.
Step-by-Step: How to Test the Air Quality in Your Home for Mold
Mold testing starts with looking and smelling. Then you can measure.
- Inspect visually. Check bathrooms, basements, under sinks, and around windows for staining or fuzzy growth.
- Check moisture. Use a hygrometer or your monitor's humidity reading. Levels that stay high suggest a moisture problem.
- Note the odor. A musty smell in one spot points you to where to look.
- Track readings over time. Log humidity for at least a week in the suspect room.
- Fix the source. Repair leaks and improve ventilation before worrying about the air itself.
If you find visible mold covering a larger area, call a professional. A professional can help assess ventilation and duct issues that may be feeding moisture into your home. You can also read our guide on how to clean air ducts effectively yourself if you plan to tackle duct cleaning on your own.
Reading Your Results and Their Limits
A reading is only as useful as the test behind it. The goal is not to chase a single number but to understand what the number represents and how much confidence to place in it.
Units and averaging periods
Different pollutants are reported in different units, and mixing them up is a common source of confusion:
- PM2.5 is typically reported in micrograms per cubic meter (µg/m³).
- CO2 is typically reported in parts per million (ppm).
- VOCs are often reported as a relative index or in parts per billion (ppb), depending on the device.
- Humidity is reported as relative humidity (RH) in percent.
Averaging periods matter too. A monitor may show a one-minute reading, a rolling average, or a longer-term average. A brief spike during cooking is not the same as a sustained elevated reading over hours. Compare like with like: a short-term spike against a short-term baseline, and a multi-day average against a multi-day average.
Sensor accuracy and calibration
Consumer sensors are estimates, not laboratory instruments. Low-cost particle sensors can drift over time and may benefit from periodic cleaning or calibration according to the manufacturer's instructions. CO2 sensors vary widely in accuracy, and VOC sensors are especially sensitive to temperature, humidity, and sensor age. Treat readings as relative trends, is this room better or worse than it was last week, and better or worse than another room, rather than as absolute values you can compare to a single universal threshold.
When a reading warrants follow-up
Rather than chasing a universal cutoff, use a pattern-based approach:
- A sustained reading that is clearly higher than your own baseline in the same room, under similar conditions, is worth investigating.
- A reading that rises with a specific activity, cooking, cleaning, showering, running the dryer, points to a source you can control.
- A reading that stays elevated after you have addressed the obvious source suggests a ventilation, duct, or moisture issue worth a closer look.
- A reading that improves when you leave the room or open a window confirms a ventilation or source problem rather than a sensor fault.
Watch out: comparing your reading to a number you saw online, without knowing that source's averaging period and sensor type, will often lead you to fix the wrong thing.
Retesting and next steps
Retest in the same spot, under similar conditions, after you make a change, opening a window, cleaning a filter, repairing a leak, or adjusting ventilation. If the reading does not improve, or if you cannot identify a source, a professional assessment can look at the whole system, including ducts, vents, and the dryer. If your readings stay poor after fixing sources, our guidance on how often to clean air ducts explains typical timing, and air duct cleaning may be the right next step for recurring dust and airflow issues.
Deciding Your Next Step: Booking Indoor Air Quality Testing
Start with simple checks and a monitor. If problems continue, the next step is a professional look at your ducts, vents, and dryer. Many homeowners find that air duct cleaning solves recurring dust and airflow issues.
Watch for these signs that you should call in help:
- Musty odors that return after cleaning
- Visible mold or water damage
- Dust that keeps building up on vents
- Poor airflow from one or more rooms
If you are ready to act, call Wilson Carpet & Air Duct Cleaning, LLC to talk through your results.
Frequently Asked Questions
Can I test indoor air quality myself?
Yes. Consumer monitors measure common indicators such as particulate matter, carbon dioxide, humidity, and temperature, and many show readings on a phone app. They work well for tracking trends in your home over time. They do not identify every pollutant, though, and they cannot confirm mold on their own. For mold or a specific chemical concern, a lab-based air sample or surface sample is more reliable, and a professional assessment can help when results are unclear.
How do I check my room air quality at home?
Place a monitor in the room at about breathing height, away from windows, doors, and supply vents. Let it run for at least a few days so you capture normal daily patterns, including cooking, cleaning, and occupancy. Note when you open windows or run the exhaust fan. Compare readings across rooms and times of day, and look for spikes that line up with specific activities. This approach shows patterns more clearly than a single snapshot.
How do I test the air quality in my home for mold?
Start by looking for visible growth and musty odors, and check areas with past water damage, condensation, or poor ventilation. Consumer air monitors do not measure mold directly, so a mold-specific test is needed for a clear answer. Air samples and surface swabs sent to an accredited lab can identify mold types and concentrations. Compare indoor results with an outdoor sample taken at the same time to judge whether indoor levels are elevated.
When should I hire a professional for indoor air quality testing?
Consider a professional assessment if you see visible mold, if residents have ongoing symptoms that improve when they leave the home, if you have recent water damage, or if your monitor readings stay high even after you improve ventilation. A professional can select the right sampling methods for the pollutants involved and explain results in context. Ask whether the provider uses accredited labs and whether they will explain the uncertainty in the readings.